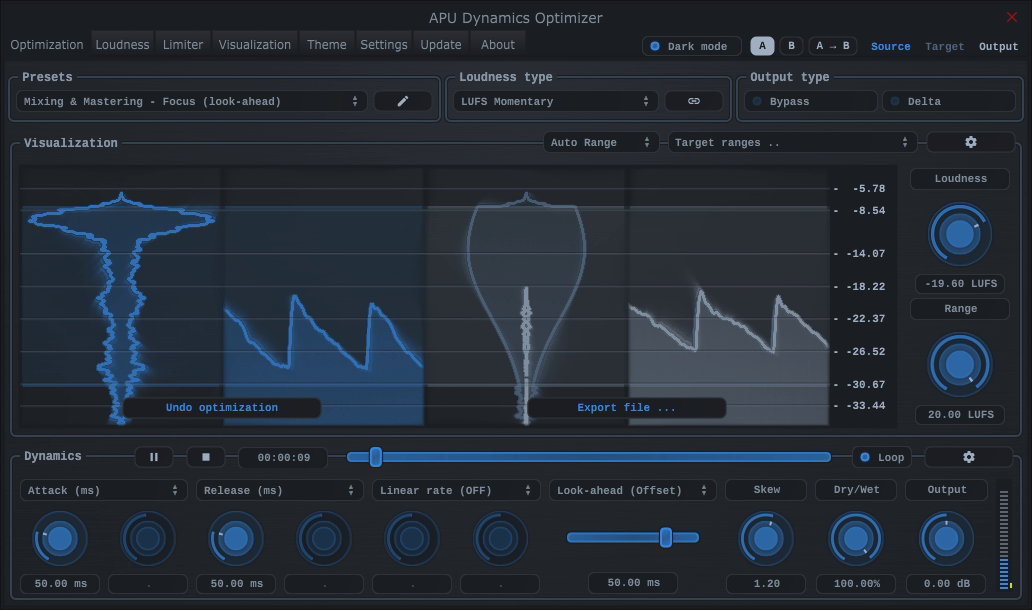
2.1. Optimization
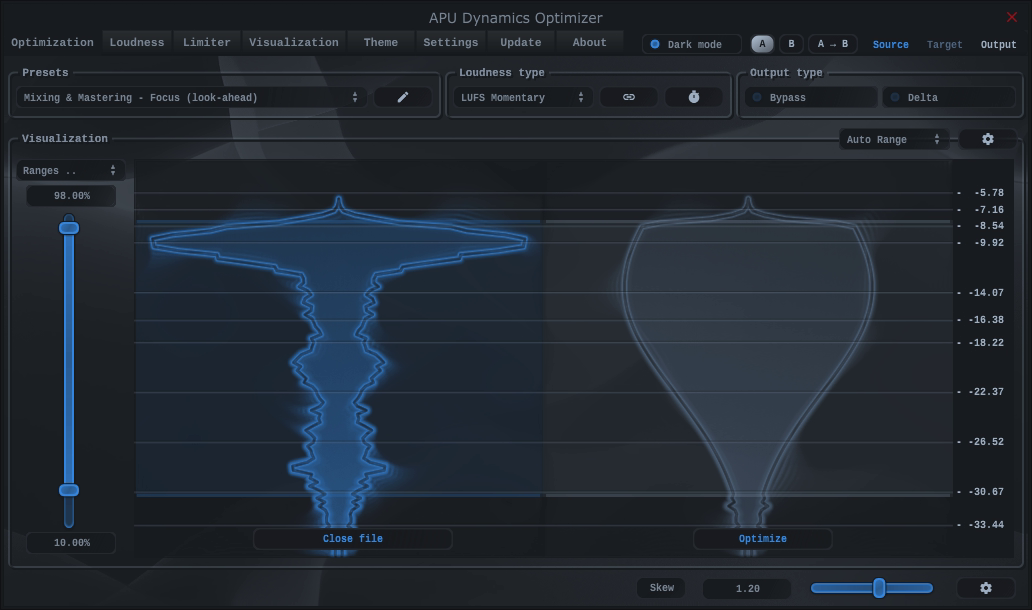
The optimization tab leads you through the optimization process. First, you can open an audio file for analysis. You can either use the file open button to browse for a file, or you can drag and drop a file onto the window. From that point, you’ll be able to select a range of the audio to optimize.
The default range is set to match the percentiles used by the LRA (“loudness range”) algorithm. This is generally a good starting point for most audio. However, you can adjust the range to suit your needs. Loudness outside of this range will have make-up gain applied automatically, and you can adjust that behavior further using the low-level type parameter.
You can also simply select the entire range (100%, 100%) and then adjust the distribution skew parameter to roughly match the shapes. This gives you a good starting point for adjusting the overall loudness and dynamic range after optimization.
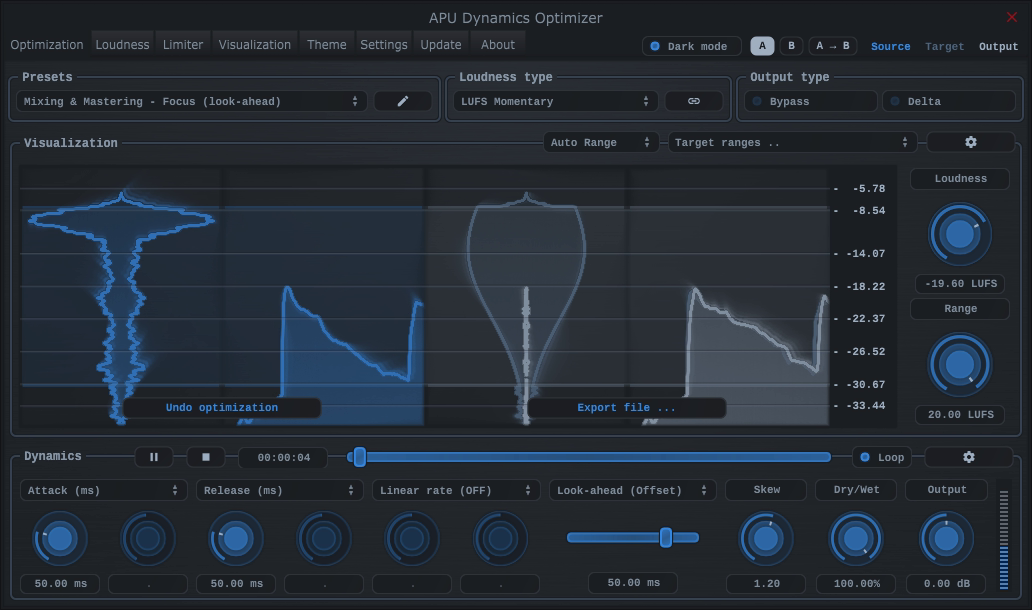
Once you have selected a range, you can press the right arrow button to perform the optimization. After optimization is complete, you can use the playback controls to listen to the results. From here you can make adjustments to attack/release and other parameters. Once you are happy with the results, press the downward arrow button to render to 32-bit float wav file.
All processing done by this optimizer is done in the same sample rate as the input file, using 32-bit float samples. This is done to maximize the quality of the output file and to avoid any clipping.